
Introduction
Data is our obsession, and we're guessing that it's yours too.
But making sense of all the data out there is impossible for any human to do. With Zoomph, you can easily collect, interpret, and extrapolate meaning from your data.
Our monitoring features specifically help you keep a real-time pulse on your digital audiences. This guide will walk you through the different reports, workflows, and tools inside Monitoring. Follow the step-by-step directions to get started right away.
Table of Contents
- Homepage Basics and Creating Your First Project
- Zoomph Feeds
- Analytics Reports
- Workflows
Homepage Basics and Creating Your First Project
To sign into your Zoomph account, simply go to the Zoomph website and click SIGN IN. Once you sign in, you'll immediately land on your dashboard (aka your homepage).
The first thing you'll see is a welcome message about Projects. Projects are essentially folders for keeping your feeds, reports, visuals, and other Zoomph assets organized. Most customers create projects for their different marketing campaigns, but you can use Projects however way you want.
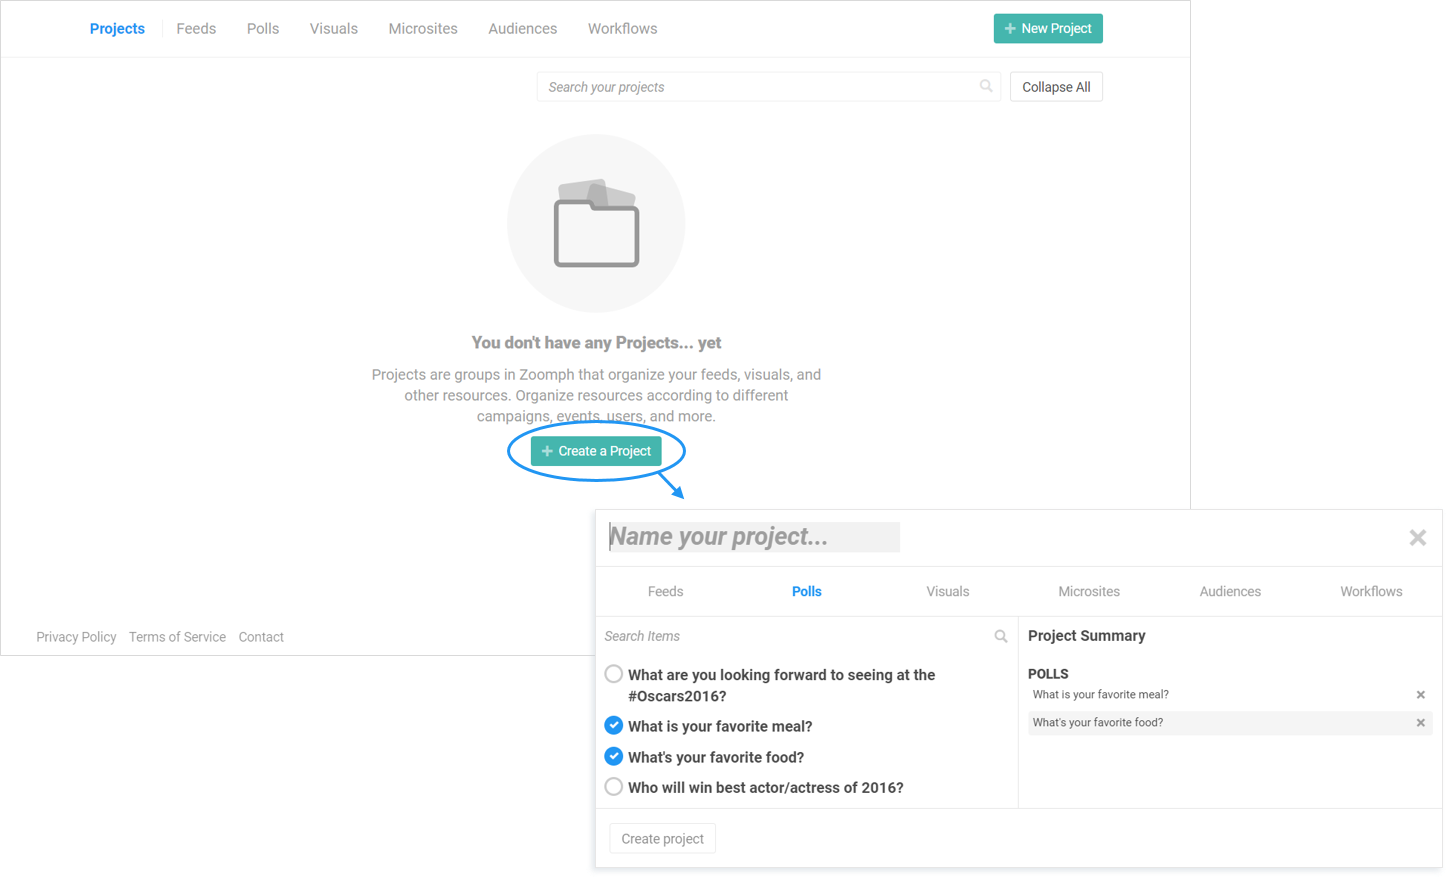
You can either create a project now or later. It's simply important to note that whenever you log into Zoomph, you'll see your Projects first.
From your homepage, you can click to any feed, visual, audience, or workflow using the tabs at the top. Depending on which tab you're in, you'll be given different quick-action and sorting options.

Zoomph Feeds
Feeds are the foundation of everything you do in Zoomph. They let you query social media or custom sources (like RSS feeds) and collect content for your analytics reports or digital activations.
Navigating to Feeds
You can access feeds from three places in Zoomph:
- Home > Projects > ‘+ Quick Create’ > Feed
- Home > Feeds > ‘+ New Feed’
Building Your Feed
From the feed configuration menu, follow these quick steps:
- Define a title for your feed. This will only be viewable internally by your account members.
- Select which social media channels you’d like to curate content from.
- For each channel you select, connect a handle/account (branded or personal) to grant Zoomph permission to collect content on your behalf. Don't worry, we won't collect any private or personal information using this handle.
- Define the search criteria (hashtags, handles, keywords, phrases, or pages) that you’d like to track. Each channel has a different set of search terms that can be entered—check the guides that are provided for you on this page.
Where appropriate, search for exact phrase matches by entering words between quotation marks (e.g., “Zoomph rocks”). To search for posts published by a certain handle, add from:@handle as a search term. To search for posts that meet two or more criteria, simply enter multiple terms, separated by commas, as one search term (e.g., #Zoomph, #love). Refer to the channel guides to learn how to add fuzzy search, and/or other unique criteria.
(Options) Click the geo pin to create a geo-specific search. Enter a location and the terms you'd like to track in the given search fields.
For more help creating your first feed, refer to this article.
Analytics Reports
Our reports let you slice and dice data in various ways. Keep a pulse on real-time engagement, parse through hashtag data, or compare any two feeds together.
Access your reports in one of several main ways:
- Home > Projects > Feeds > ANALYTICS
- Home > Feeds > ANALYTICS or ENGAGEMENT

- Monitoring > [any report of choice]
Overview and Engagement Reports
When you click into ANALYTICS or ENGAGEMENT, you'll be taken to one of two reports: the Feed Overview Report or Engagement Report, respectively.
The Overview Report provides summary analytics on the content and authors in your feed, including activity and engagement metrics, sentiment, top influencers, and top words.

Like all Zoomph reports, the Overview Report can be filtered, printed, and emailed using the actions menu at the top of the page.

Get a more detailed breakdown of your Overview Report.
The Engagement Report helps you measure impact across the social channels and authors tracked by your feed. The report identifies the top handles who are helping to keep the conversation moving, and is divided by social channel to provide tailored insights for each platform.
You'll receive high-level KPIs for each channel, along with specific engagement metrics around the most active authors in your feed. (The report will show up to 75 of the most active authors.)
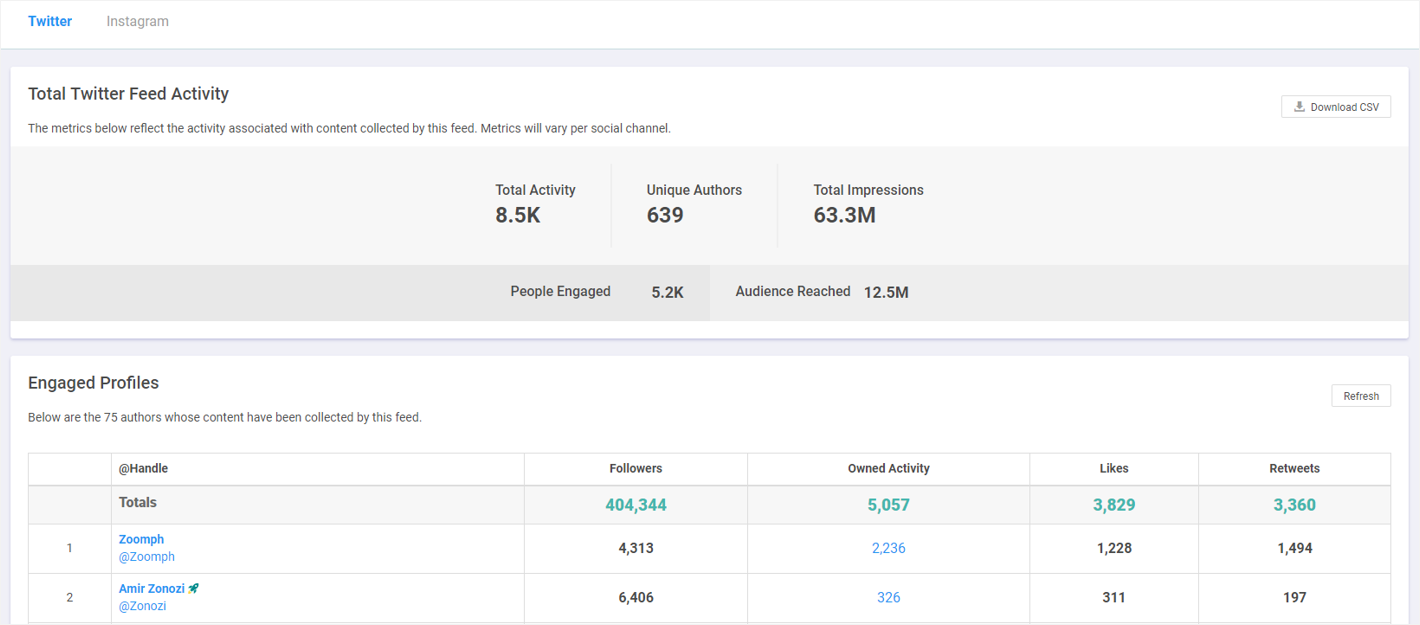
Many users refer to this report to understand which channel is giving their campaigns the most momentum and why. You can not only trace engagement back to the specific account or influencer, but keep track of their performance over time.
By clicking the number listed under the 'Owned Activity' column of any handle, you can see the specific posts that are generating engagement (this will essentially take you to your Content Discovery Report).
See a more detailed breakdown of the Engagement Report.
Other Reports in Zoomph
Other granular analytics reports can be found under the 'Monitoring' tab in your left navigation menu. These include:
- Feed Comparison - Get side-by-side analytics around 2-4 feeds at a time
- Influencer Discovery - See a list of the most influential handles in your feed, as ranked by Zoomph's ZPoints algorithm
- Sentiment - Discover how much activity expresses positive, negative, or neutral sentiment
- Geo Insights - Find where social activity originated and locate authors on a map
- Hashtags - Drill down into the top four hashtags in your feed and learn how they're being used
- Associations - Identify the brands, celebrities, and shows that authors in your feed regularly engage with
Workflows
Zoomph offers a number of tools to sharpen your efficiency and support your daily tasks. Workflows are some of our most valuable features and let you automate certain actions in our platform. They rely on Boolean logic to auto-tag content, moderate posts, auto-notify your account users, and more.
Navigating to Workflows
Access Workflows by either navigating to...
- Home > Projects > '+ Quick Create' > Workflow
- Tools > Workflows
Building a Workflow
From the workflow configuration menu, follow these steps:
- Name your workflow and decide whether to enable it immediately or save it for later.
- Add a description to explain the purpose of your workflow. This will help you and your team quickly understand what your workflow is doing without having to investigate its settings.
- Connect a feed(s) to which you want to apply your workflow. If you don't specify a feed, the workflow will automatically be applied to all your feeds.
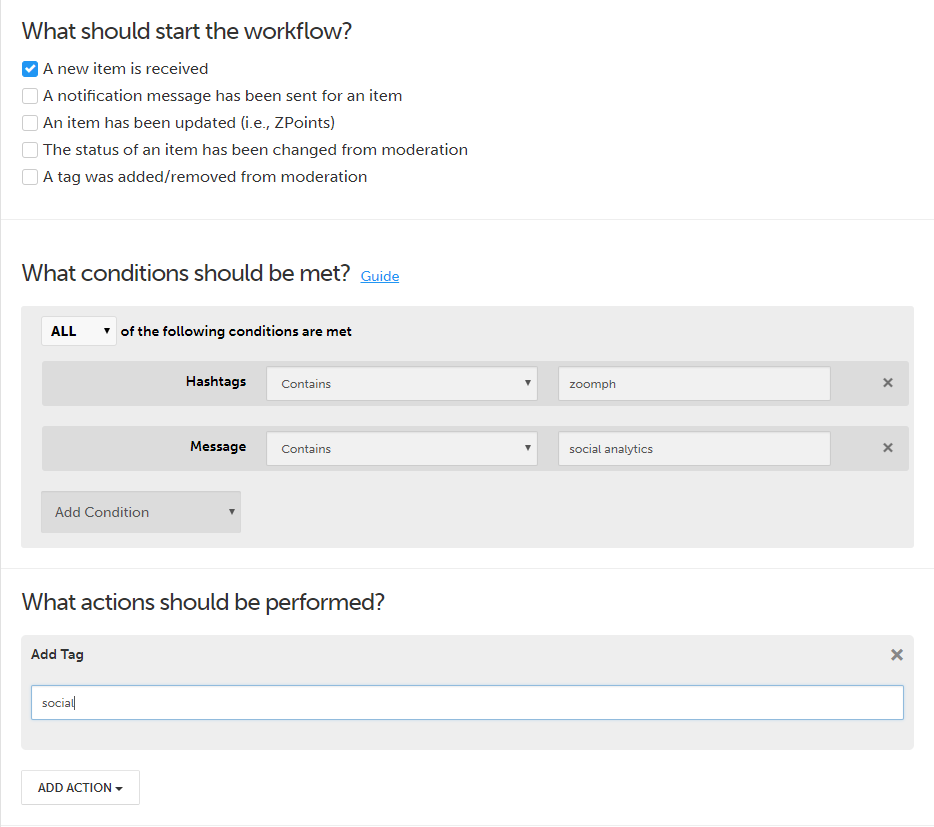
- Set a trigger, or an event that needs to occur to activate your workflow. Events are the "When this happens, then..." part of your workflow.
- Create specific Boolean-based conditions defining the criteria that needs to be met for your workflow to activate. Choose between AND, OR, or NONE statements when deciding whether to combine various rules or not (e.g., “If an incoming post contains a photo AND a specific hashtag, then...”).
- Define an action that you’d like your workflow to perform if an item meets all the criteria (e.g., “If an incoming post contains a photo and a specific hashtag, the auto-approve it.”) At this point, you’ll see sample content that meets your criteria under Preview, which is there to help you validate your events and conditions.
- Click 'Save' to complete your workflow setup.
Learn more about how workflows work or what types of conditions you can set.