
While being able to hand-select content for your visuals is ideal, we know you might not always have the time or means to manually moderate. You might be running around at an event, or maybe you'd like to "set it and forget it" so to help simplify your work, we've created Moderation Settings.
Moderation Settings allow you to automate the process of approving and rejecting content, and create rules and filters that allow you to moderate more efficiently!
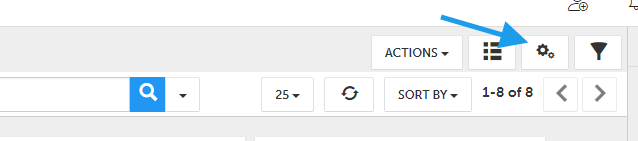
To access moderation settings, open Moderation of any feed, and click the Settings icon at the top of the page.
Any moderation settings that you configure are applied from the moment you save the settings, and are not applied retroactively to content that already in your feed.
By default, all feeds are set to require review when they are first created, so initially nothing is approved with you seeing it first!
If you elect to Auto-approve all content, everything that is pulled into your feed will be automatically approved for your visuals. If you apply other settings along with the Auto-approve all content feature, items will fall through those filters before being automatically approved.

Profanity Filter: Zoomph's profanity filter is automatically turned on for all feeds. We've curated this list of bad words by recording ourselves assembling Swedish furniture, and spending a little too much time on Urban Dictionary.
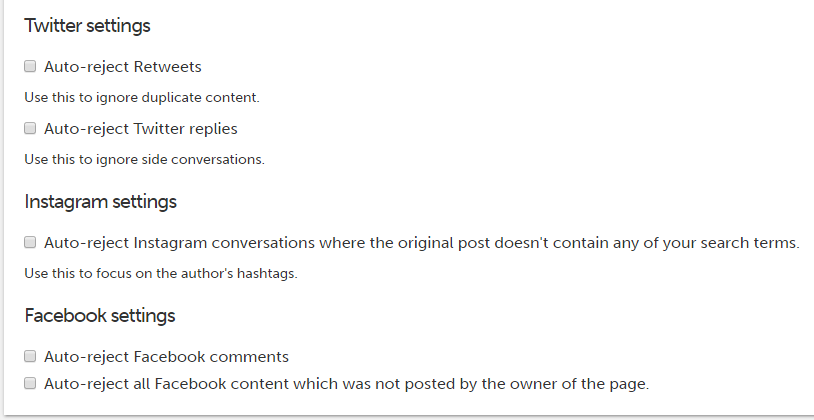
The next group of settings available are filters specific to the nature of the each social networks we integrate with.
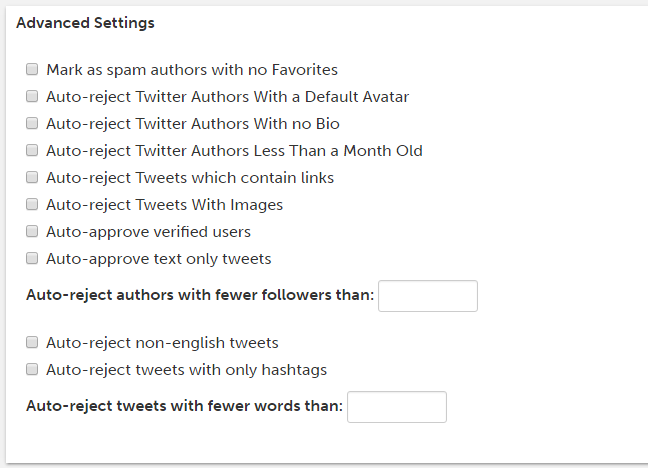
Next, are advanced settings specific to Twitter. No one like spam bots littering their feeds, so these can help separate bots and trolls from your real audience!
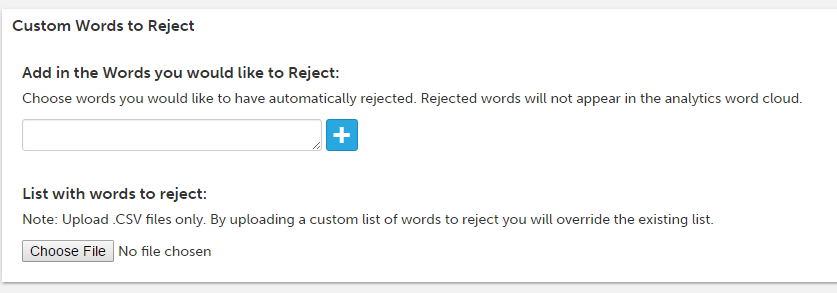
Along with the Profanity Filter, you can also add your own custom list of words to reject. Any content that is pulled into your feed that contains any of the words you specify will be automatically rejected. This is great for keeping conversations about your competitors out of the mix, and weeding out other inappropriate or irrelevant items being posted to your search terms.
You can add individual words by typing them in the field, and clicking the + button. You can also upload a .CSV file containing your words.
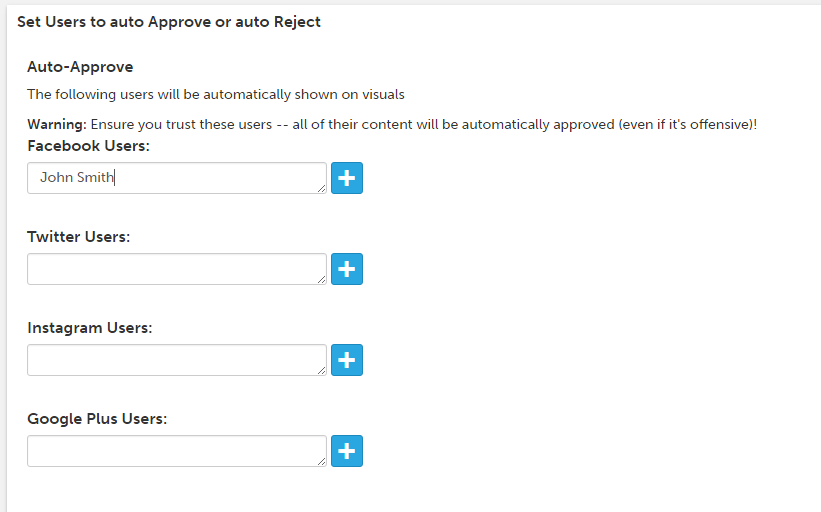
You can Auto-approve or Auto-reject all content from specific users as well.
Simply add their user handle(s) into the field, and click +. You can separate multiple handles with a comma. No need to type the @ symbol. For Facebook users or pages, type the name in the field the way it appears on Facebook.
Once you have added all of your automation's and filters, click 'Save', and all new content coming into your feed will fall through your settings.