
Zoomph Displays are great for showing your social content at live events, as well around your office to promote social interaction within your organization.
As you prepare to make a display, be sure you've done the following:
- Create a feed to collect content to be displayed.
- Approve posts in moderation of your feed(s) to be displayed. Only approved content appears on displays.
Getting Started
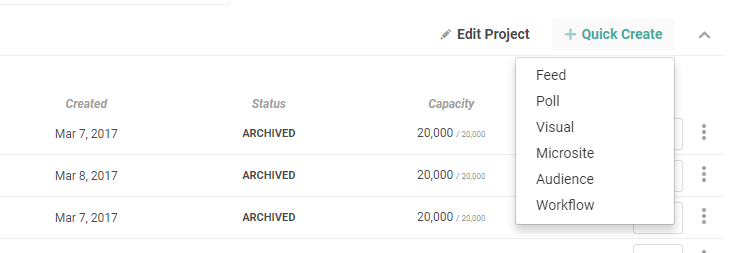
There two places in the platform where you can create a display from:
- Projects by clicking 'Quick Create'
- From the Visuals tab by clicking 'New Visual'
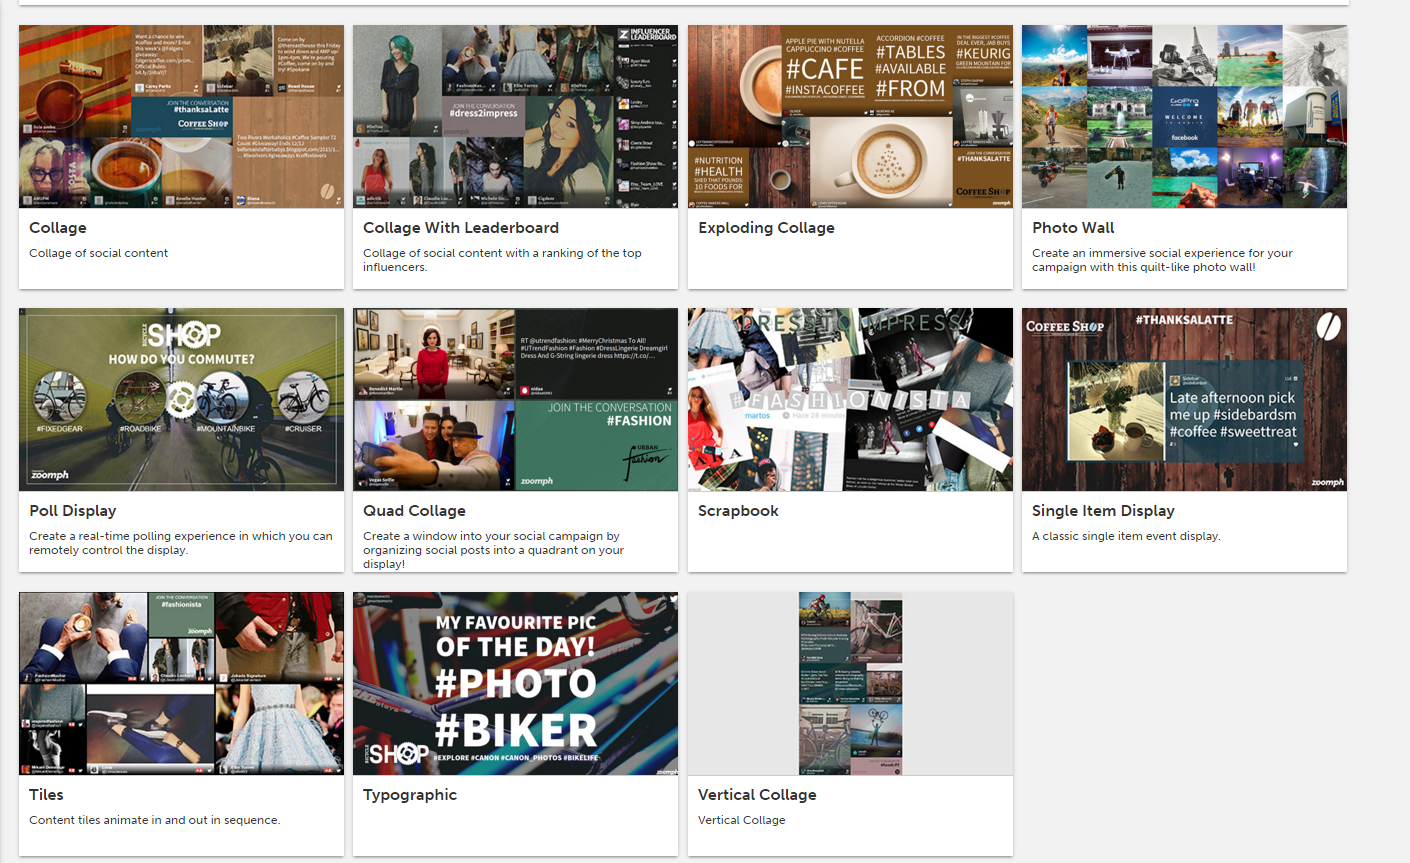
When creating a display, you'll first be given the option to select from a number of different display templates we have.

Each template has a unique look and feel and in some cases, unique functions that fit every preference and use case. An sample image of each template is provided to give you an idea what each display looks like. We release new templates to our library regularly.
 While each of the different templates are unique, the steps in creating each are relatively the same.
Start by titling your display (this is internal) and then select the feed that you'd like to connect the display to. Again, be sure you have approved content in the moderation of that feed, or else your visual will appear blank!
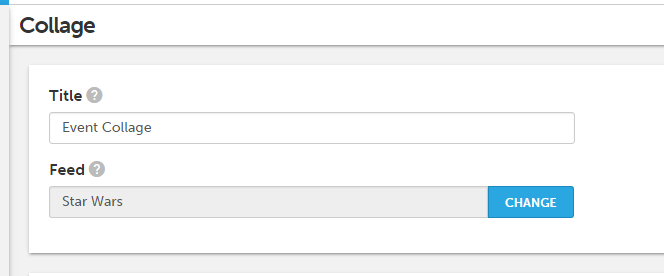
Pro Tip: Any feeds can be connected to any visuals giving you flexibility whenever need and to save time from recreating the same displays for multiple feeds.
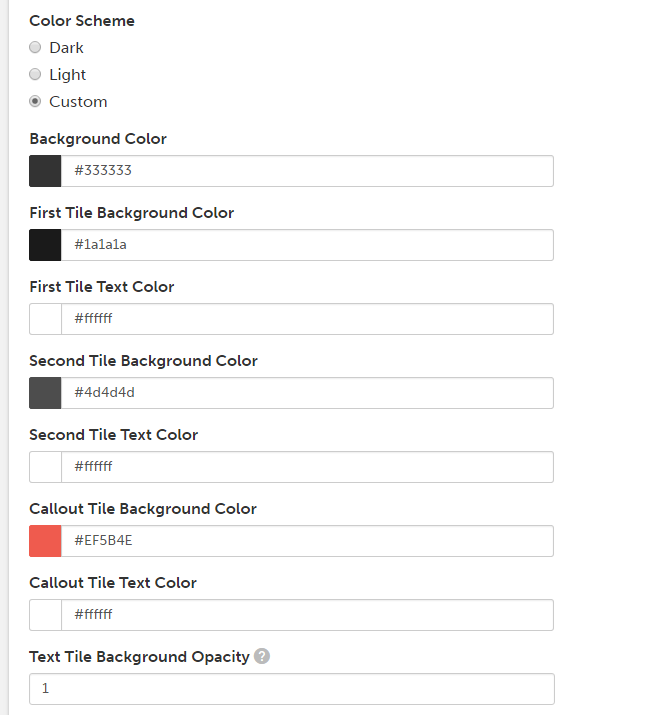
Next up is picking the different colors of your display. You use our pre-made themes, or select the 'Custom' option to pick your desired colors.
You can use our color picker to select your desired colors, or use hex color codes to match your exact branding.
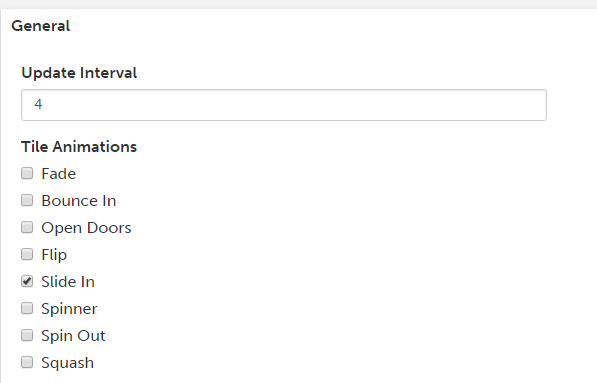
 The next set of customizations includes things such as choosing how quickly your display shows new posts, how your content animates in and out, and more!
Next, is choosing your callout text. The callout is the hashtag, handle or other action that you'd like your audience to use when posting so they can appear on your visual! This will appear automatically on your visual (different templates have it placed in different areas).
You can also upload custom background images and logos to your display.
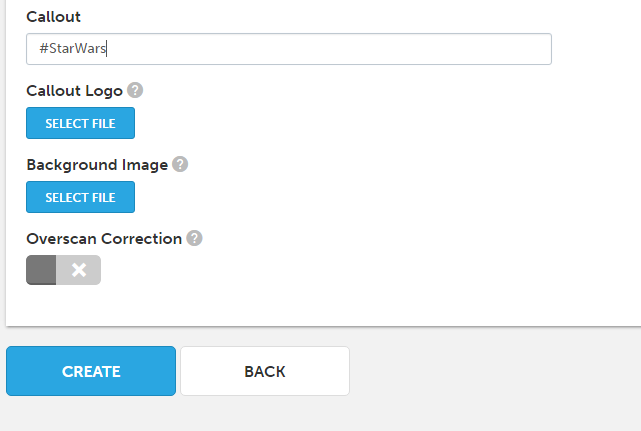 Overscan correction: Overscan correction adds padding to the edges of your display in the event that the screen you use is cutting off the edges of your visual when it shown on screen.
When you've completed your display, click Create and in just a few seconds, your display will be ready for you to launch!
To view your display in full screen (hide your browser tabs) press F11 if you're on a PC in Google Chrome, or Command >Shift>F if you're in Chrome on a Mac.